Linea, the land of many bridges
Any L2 is going to have a lot of connections to other networks. Some of these bridges will be made by Consensys and Linea, some by projects collaborating with us; eventually, some may be made without our knowledge—that’s what 'permissionless' means.
What's going on here?
Linea, like any other rollup network, is designed to offer its own experience, while 'reporting back' to another network (usually Ethereum Mainnet) on all the activity that happens on it (at least, at the level of transactions); this means that the 'Layer 1' network is tracking all the activity on the 'Layer 2'. In this way, L2s are said to 'inherit the security of the L1'.
One of the main reasons you would want a rollup network is for it to be totally interoperable with the L1, and one of the main things you need to make networks interoperable is enable people to move things back and forth between them. The class of tools used to do this, broadly, are called bridges.
Ok, now you're up to speed 🚀
The Linea bridge ecosystem
The Canonical Message Bridge
The main "bridge", on a technical level, in Linea is the Canonical Message Bridge. This is the underlying set of smart contracts which keep track of receiving requests to move tokens to the other layer, and of sending the message that those tokens should be transferred.
The Postfrens
This message is then picked up by programs serving as "postmen", and moved to the other network, where the receiving smart contract executes according to the message received.
The Canonical Token Bridge
If you want to move tokens between L1 and L2, we recommend you use the bridge made on top of the Canonical Message Bridge, specifically for this purpose: the Canonical Token Bridge, currently located at https://bridge.linea.build: instructions below!
Official, Third-Party, Permissionless Bridges, and beyond
As the network grows, we'll be updating this space with a user's guide to the bridges of Linea.
This is a step by step guide on how to bridge ETH from Ethereum (L1) to Linea (L2) and Linea (L2) to Ethereum (L1). The screenshots provided are examples of bridging ETH for Linea and Ethereum Mainnet. To bridge ETH over Testnet, simply click the testnet button at the bottom left of the token bridge page and follow the same steps as below.
Manual vs Automatic Claiming
Manual claiming requires two transactions to be approved. One on the source layer to initiate the bridging process and the other on the target layer by the recipient to receive the funds, which we call "claiming". This means that in order to receive the funds, the recipient has to pay a fee on the target layer.
Automatic claiming only requires one transaction to be approved on the source layer. The recipient will automatically receive their funds because a "postman" will handle the claiming process for them.
What are the execution fees?
There are two types of execution fees that can be applied when you are bridging your tokens, the postman fee and the anti-DDOS fee.
The postman fee is only applied during the automatic claiming process and is calculated by the following formula:
Postman Fee = target layer gas price * (gas estimated + gas limit surplus) * margin where target layer gas price is eth_gasPrice on the target layer, gas estimated = 100,000, gas limit surplus = 6000, and margin = 2.
The anti-DDOS fee is only applied when bridging from L2 to L1 and is set to 0.001 Eth
Video Tutorial
Checkout this video on how to use our bridge!
Bridging ETH from Ethereum to Linea
Please use the automatic claiming option the first time you bridge ETH from L1 to L2. Manual claiming requires you to have L2 ETH available to pay for the fees. If you don't have enough L2 ETH to cover the fees, your transaction will be stuck on the bridge until you can cover the fees!
Automatic Claiming:
Go to our token bridge here.
Connect your wallet in top right corner of the page.
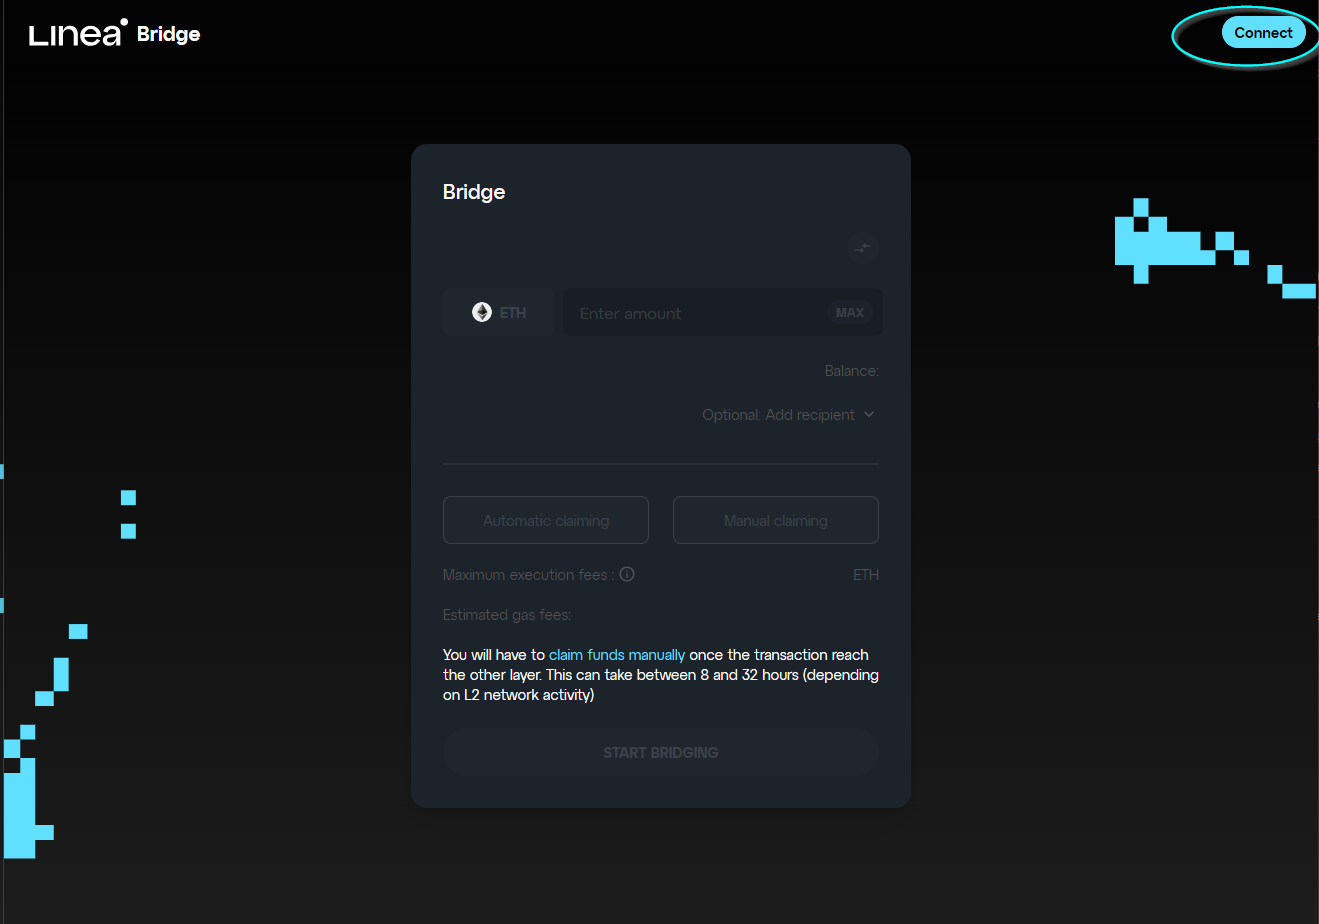
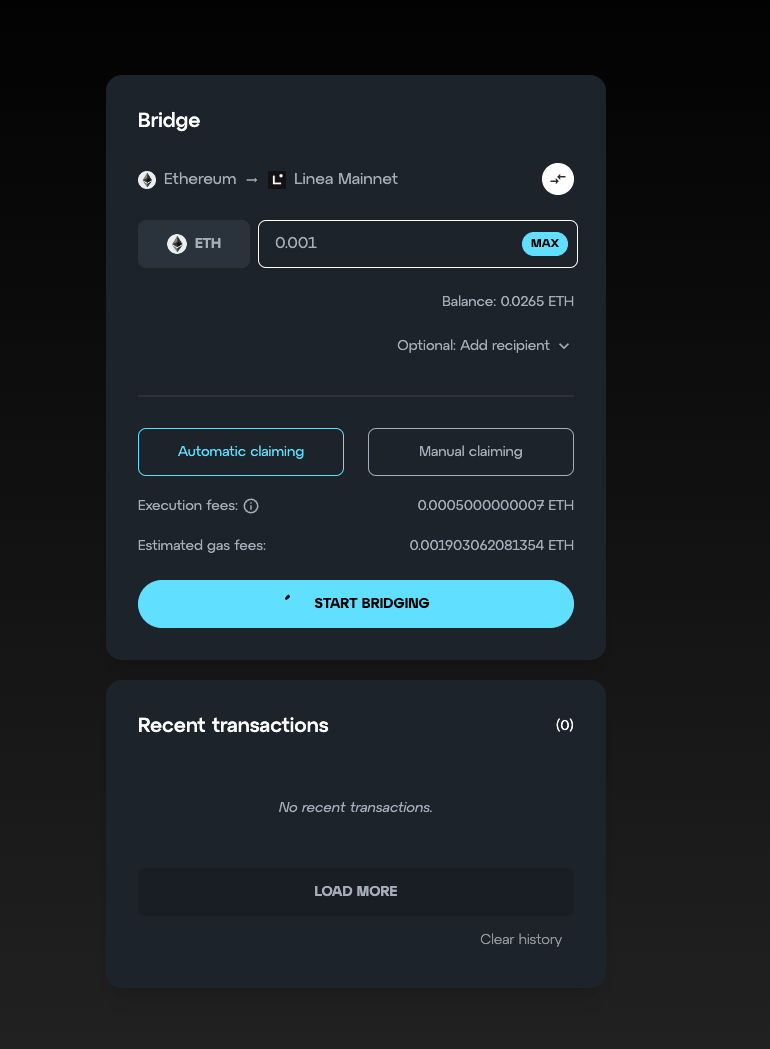
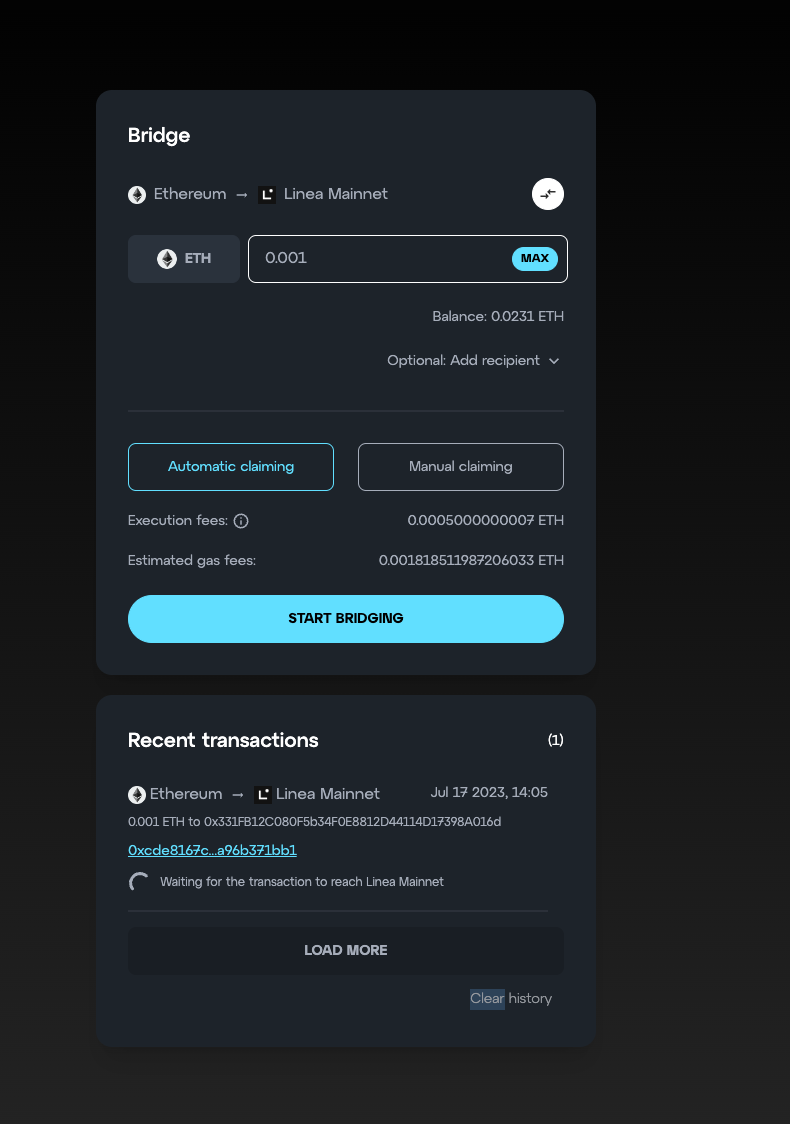
Verify that the Bridge is set to Ethereum → Linea Mainnet and that automatic claiming is enabled.
Enter the amount of ETH you want to bridge over to Linea Mainnet, and select the “Start Bridging” button.
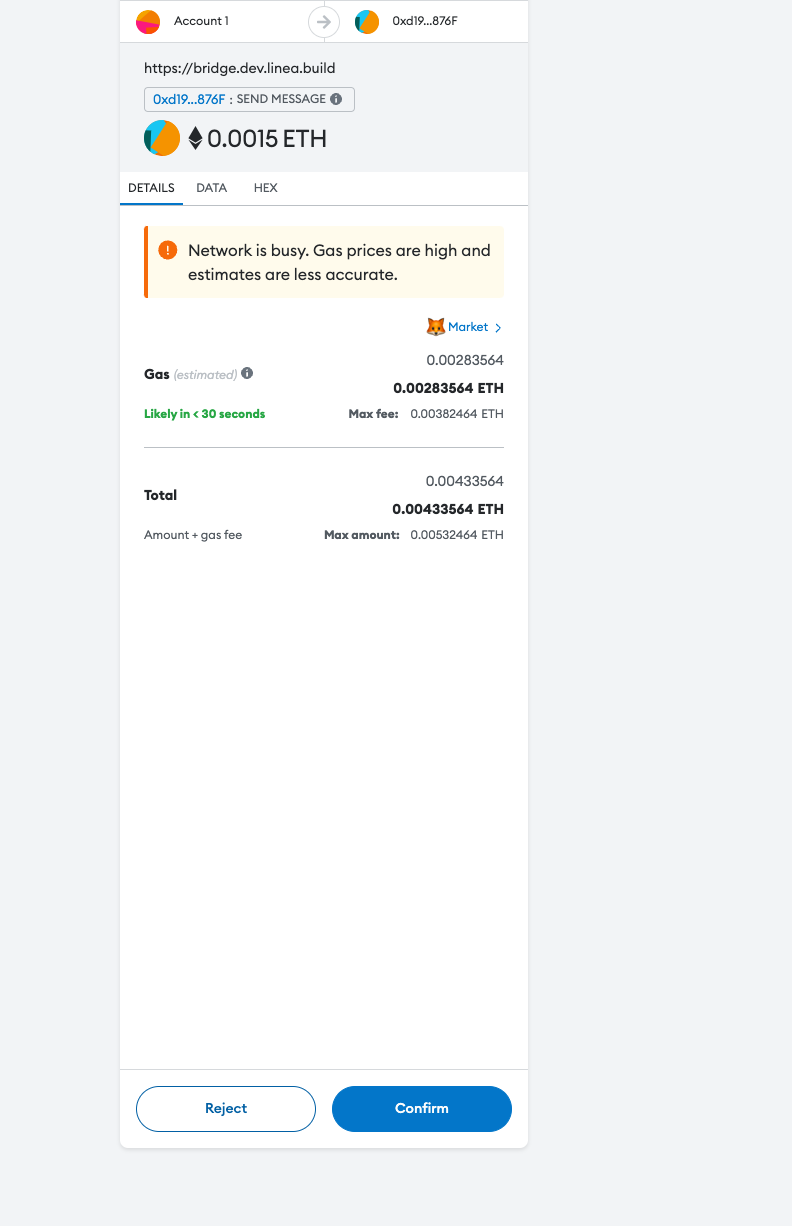
- MetaMask will pop up asking you to confirm the transaction.
- After confirming the transaction, it should take around 20 minutes for the transaction to reach Linea Mainnet. You can see your pending transaction under the "Recent Transaction" section at the bottom of the token bridge.
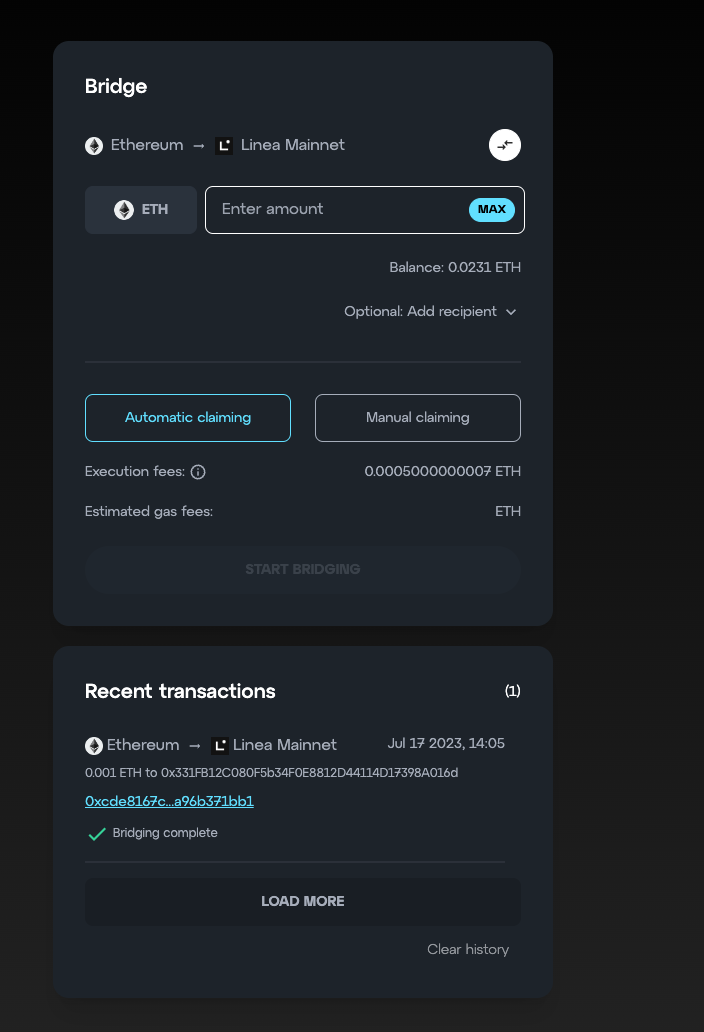
- You’re done! Under Recent Transactions, it should say "Bridging complete" and your ETH should be on Linea Mainnet. Reminder: It takes around 20 minutes for the bridging process to complete.
- You can see your Linea wallet balance in MetaMask once you switch to the Linea network. You can also check it on lineascan. Just replace the wallet address in the URL with your wallet address and it should reflect your wallet's balance!
Manual Claiming
Go to our token bridge here.
Connect your wallet in top right corner of the page.

Verify that the Bridge is set to
Ethereum → Linea Mainnet, and that manual claiming is enabled.Enter the amount of ETH you want to bridge over to Linea Mainnet, and select the Start Bridging button.
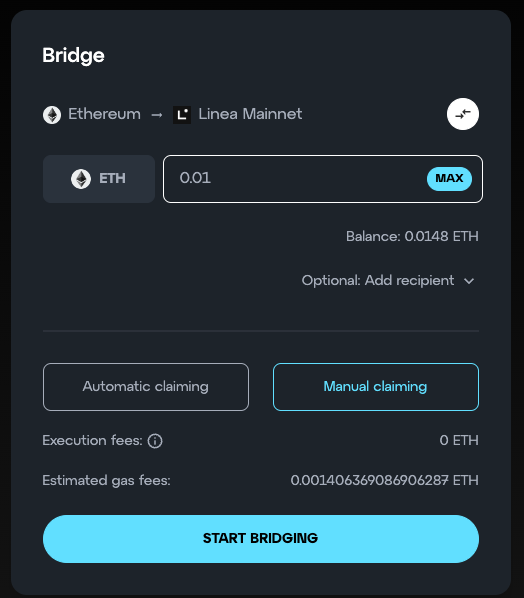
- MetaMask will pop up asking you to confirm the transaction.

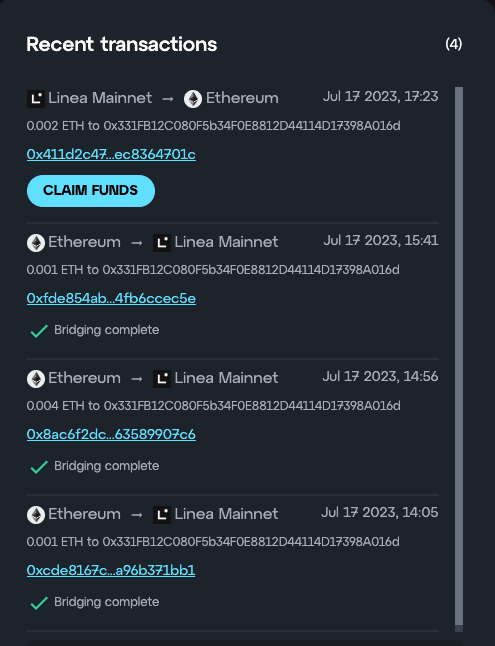
- You will see a “Claim Funds” button appear under the Recent Transactions section. Select the "Claim Funds" button to continue the bridging process.
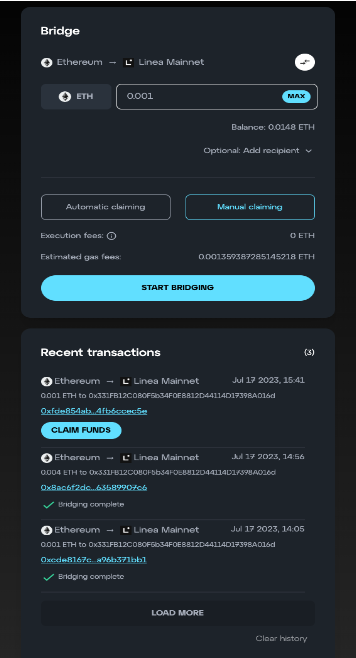
- MetaMask will prompt you to switch networks and to also confirm the transaction from the previous step.
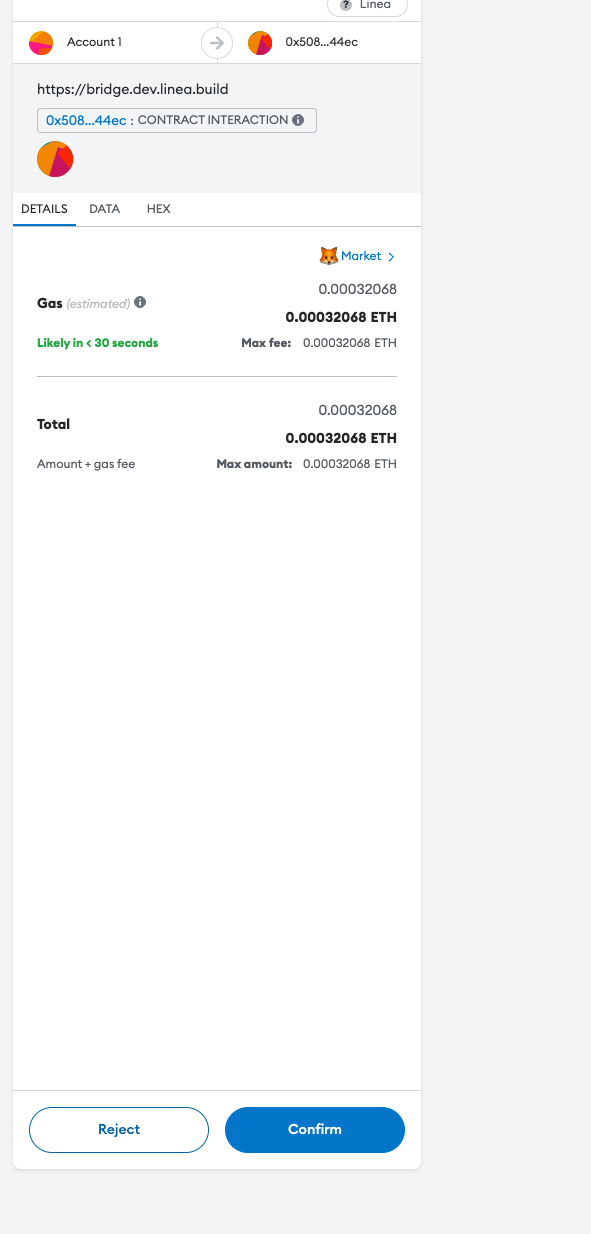
- You’re done! Under Recent Transactions, it should say "Bridging complete" and your ETH should be on Linea Mainnet. Reminder: It takes around 20 minutes for the bridging process to complete.
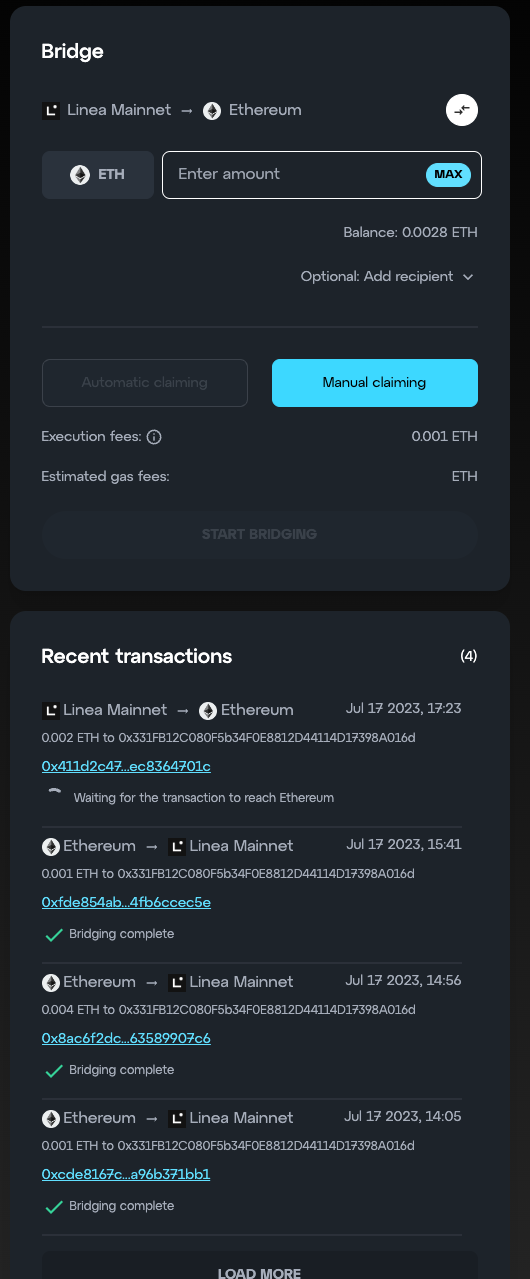
- You can see your Linea wallet balance in MetaMask once you switch to the Linea network. You can also check it on linea-scan. Just replace the wallet address in the URL with your wallet address and it should reflect your wallet's balance!
Bridging ETH from Linea Mainnet (L2) to Ethereum Mainnet (L1)
Automatic claiming is only available for ETH L1 to L2 bridging. You will not be able to select this option for L2 to L1 bridging.
Go to our token bridge here.
Connect your wallet in top right corner of the page.

Verify that the Bridge is set to Linea Mainnet --> Ethereum. Manual claiming is the only available option for L2 to L1 bridging.
Enter the amount of ETH you want to bridge over to Linea Mainnet, and select the “Start Bridging” button.
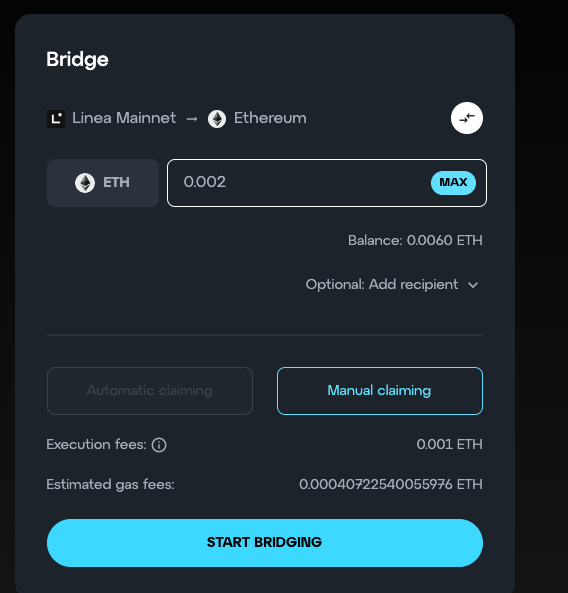
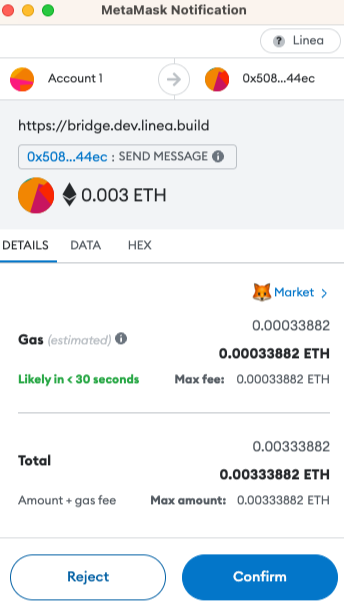
- MetaMask will pop up and ask you to confirm the transaction.
- The pending transaction will show up in the “Recent Transactions” section of the bridge. Reminder: It takes at least 8 hours for the transaction to go through from L2 to L1.
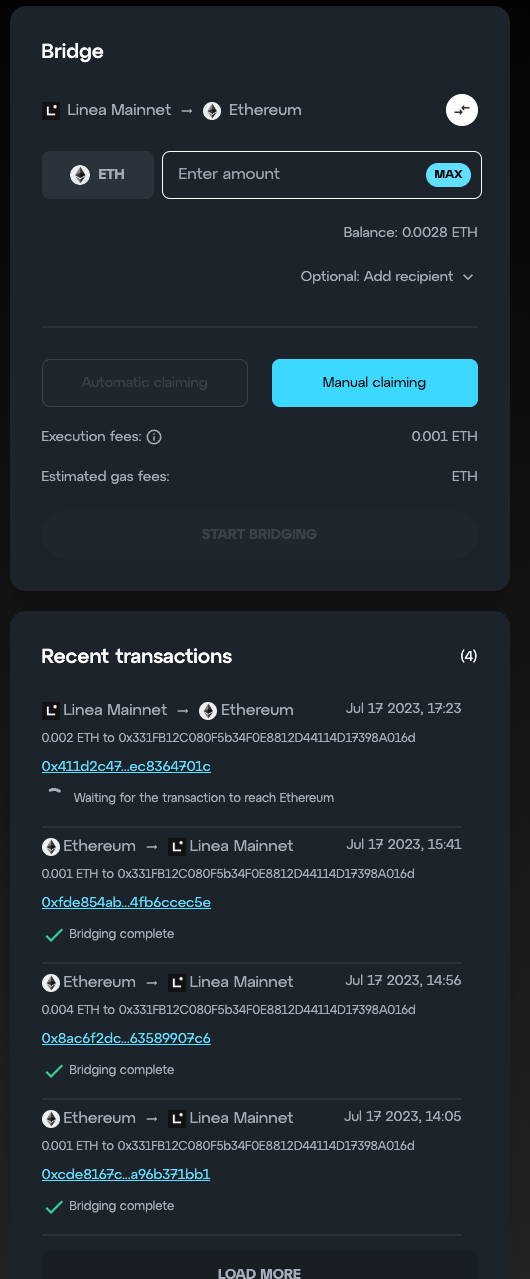
- You will see a “Claim Funds” button appear under the Recent Transactions section. Select the "Claim Funds" button to continue the bridging process.
MetaMask will ask you to switch networks and to confirm the transaction from the previous step.
You're done! You can check your Ethereum wallet balance on MetaMask or a block explorer such as etherscan!
How do I bridge ERC20 tokens?
ERC20 tokens can only be bridged via manual claiming.
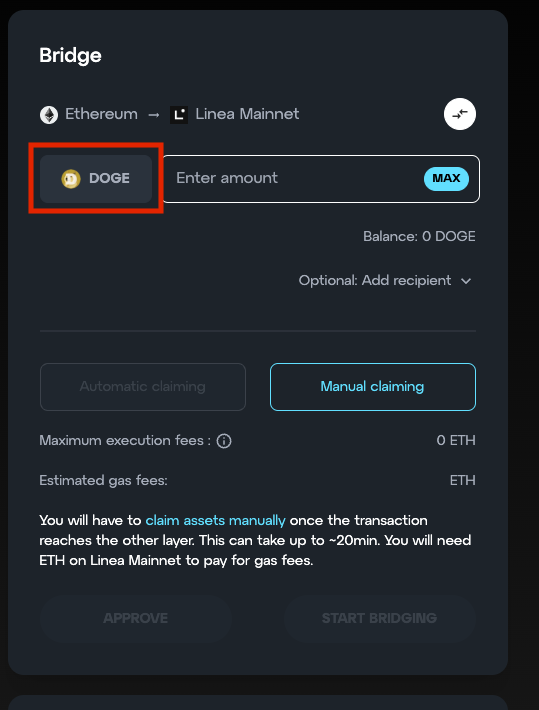
- On the token-bridge go to the token selection menu by clicking on the current token symbol (ETH in this case).
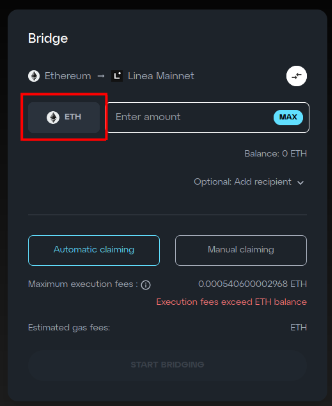
- Select one of the available tokens in the list. If the token is not in the list, paste the address of the token you want to add into the search bar.
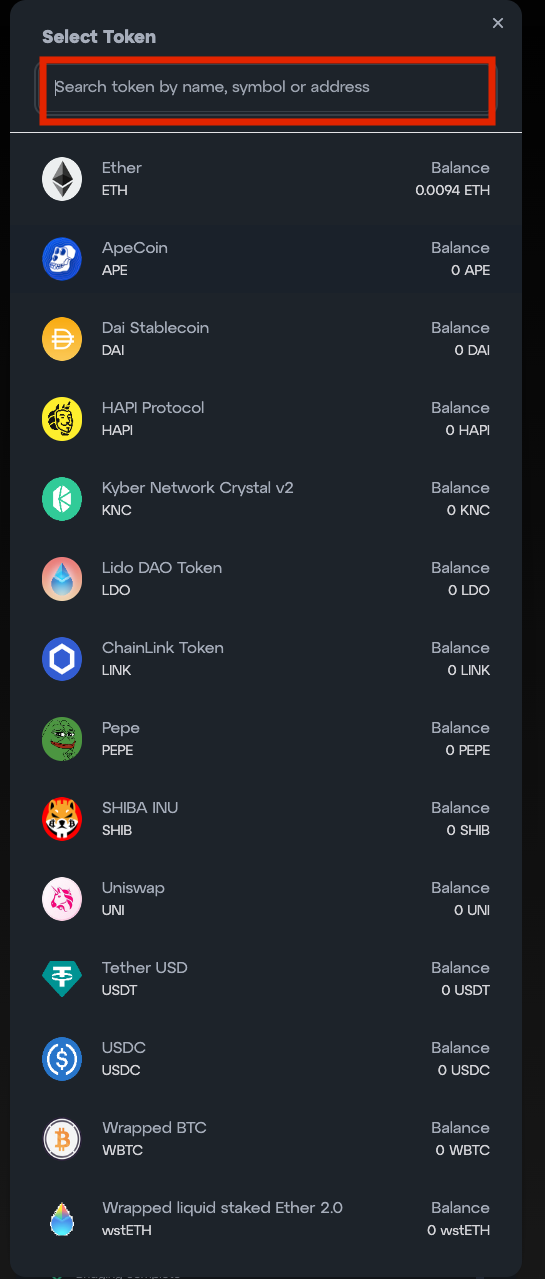
- Click on the token to select it.
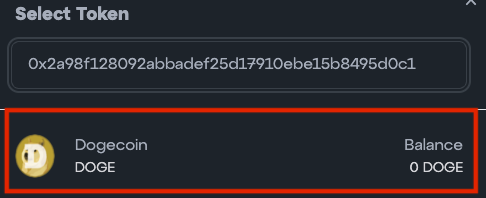
- You now can bridge this token and it’s saved in your token list for future bridging.
